在之前博客的编辑中,每一张图片都需要经历截图-改名-改大小-压缩-写img标签这几步,最后才能正常的显示在博客之中。 这样的操作确实非常耗费时间,尤其是一篇文章有二三十张图片时,还很有可能弄错。 因此下午研究了一下并用Python脚本实现了这一系列过程的自动化。经过测试效果很不错。
一、主要技术
整个自动化流程从改名开始。首先利用Python OS模块中的walk函数遍历文件夹寻找图片,然后利用字符串拼接,生成符合规范的文件名。 再用rename函数批量改名。然后对改名后的文件利用OpenCV进行读取,依据一定规则对图片大小进行缩放修改,然后输出覆盖原图。 然后调用TinyPNG的API接口,上传图片进行压缩,完成后下载覆盖原图。最后按照img标签的格式和图片大小,生成img标签文本并输出。
TinyPNG的Python非常简单。首先是需要安装tinify的包,利用pip就可以装好。然后在代码中import包,并指定tinify.key为你申请的Key。
上传与下载全部都封装在了函数里,只需要两行代码就可以搞定。
source = tinify.from_file("unoptimized.jpg")
source.to_file("optimized.jpg")
第一行代码表示从文件读取图片并上传,压缩成功后返回压缩后的图片给source。
source是tinify中定义的一个类型,自带有to_file()函数,可以将图片保存到本地。
当然也可以直接压缩网络图片,代码如下。
source = tinify.from_url("https://tinypng.com/images/panda-happy.png")
source.to_file("optimized.jpg")
更多关于Python API的使用可以参考这里。
TinyPNG每个月每个账户有500个免费压缩的次数,超过就要收费了。经过测试,同一张图片上传压缩多次只算一次。
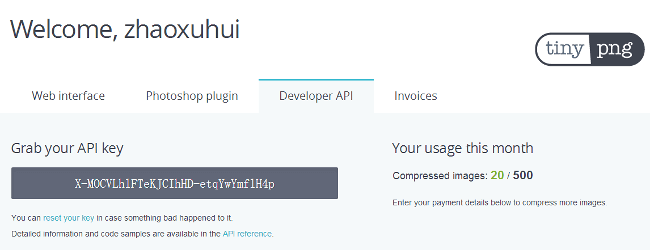
其实如果需要,可以多申请几个账户,换着用即可。申请只需要邮箱即可。下图是我的账户界面。

二、代码
# coding=utf-8
import cv2
import os.path
import datetime
import tinify


# 脚本功能
# 1.批量读取、改名
# 2.批量修改大小
# 3.批量压缩
# 4.自动插入标签

# 读取目录下所有图片的路径,返回一个list
def findAllImages(root_dir):
    paths = []
    # 遍历
    for parent, dirname, filenames in os.walk(root_dir):
        for filename in filenames:
            if filename.endswith(".jpg") or filename.endswith(".png") or filename.endswith(".PNG"):
                paths.append(parent + "\\" + filename)
    print "All images loaded."
    return paths


# 获取当前系统的日期
def getDateString():
    return datetime.datetime.now().strftime('%Y-%m-%d')


# 基于读取的图片路径和当前日期,拼接组成新的符合格式的文件名
def generateFormatName(paths, start_index):
    new_names = []
    root = paths[0][0: paths[0].rfind("\\")] + "\\"
    for i in range(len(paths)):
        new_name = root + getDateString() + "-" + '{:0>2}'.format(i + 1 + start_index) + "." + paths[i].split(".")[1]
        new_names.append(new_name)
    return new_names


# 批量将文件重命名
def renameImages(ori, new):
    for i in range(len(new)):
        os.rename(ori[i], new[i])
    print "All images are renamed."


# 修改图片大小
def resizeImage(img):
    width = img.shape[1]
    new_width = 0
    if width > 650:
        new_width = 650
    elif 650 > width >= 625:
        new_width = 625
    elif 625 > width >= 600:
        new_width = 600
    elif 600 > width >= 575:
        new_width = 575
    elif 575 > width >= 550:
        new_width = 550
    elif 550 > width >= 525:
        new_width = 525
    elif 525 > width >= 500:
        new_width = 500
    elif 500 > width >= 475:
        new_width = 475
    elif 475 > width >= 450:
        new_width = 450
    elif 450 > width >= 425:
        new_width = 425
    elif 425 > width >= 400:
        new_width = 400
    elif 400 > width >= 375:
        new_width = 375
    elif 375 > width >= 350:
        new_width = 350
    elif 350 > width > 325:
        new_width = 325
    elif 325 > width > 300:
        new_width = 300
    elif 300 > width >= 275:
        new_width = 275
    elif 275 > width >= 250:
        new_width = 250
    elif 250 > width >= 225:
        new_width = 225
    elif 225 > width >= 200:
        new_width = 200
    elif 200 > width >= 175:
        new_width = 175
    elif 175 > width >= 150:
        new_width = 150
    elif 150 > width >= 125:
        new_width = 125
    elif 125 > width >= 100:
        new_width = 100
    elif 100 > width >= 75:
        new_width = 75
    elif 75 > width >= 50:
        new_width = 50
    elif 50 > width >= 0:
        new_width = 50

    ratio = new_width * 1.0 / width
    if ratio == 0:
        ratio = 1

    res = cv2.resize(img, None, fx=ratio, fy=ratio, interpolation=cv2.INTER_CUBIC)
    return res


# 批量修改图片大小并输出覆盖原图
def saveImages(new):
    for item in new:
        img = cv2.imread(item)
        img2 = resizeImage(img)
        cv2.imwrite(item, img2)
    print "All images are resized."


# 调用TinyPNG接口进行图像压缩,并替换原图
def tinifyImage(image_paths):
    for i in range(len(image_paths)):
        source = tinify.from_file(image_paths[i])
        source.to_file(image_paths[i])
        print "Compress", format((i * 1.0 / len(image_paths)) * 100, '0.2f'), "% finished.", image_paths[i]
    print "Compress 100% finished."


# 根据文件路径生成img标签
def generateHTML(html1, html2, html3, new_paths, root):
    f = open(root + "\\img_tag.txt", "w")
    for item in new_paths:
        f.write(html1 + item[item.rfind("\\") + 1:] + html2 + cv2.imread(item).shape[1].__str__() + html3 + "\n")
    f.close()
    print "HTML tag generated successfully."


# 根据"<-img"标签自动插入图片Tag
def insertImgTag(html1, html2, html3, new_paths, file_path):
    img_tags = []
    i = 0
    out = ""

    for item in new_paths:
        img_tags.append(
            html1 + item[item.rfind("\\") + 1:] + html2 + cv2.imread(item).shape[1].__str__() + html3 + "\n")

    f = open(file_path)
    lines = f.readlines()
    for line in lines:
        if line.__contains__("<-img"):
            line = img_tags[i]
            i += 1
        out += line
    f.close()
    f = open(file_path.split('.')[-2] + "_auto.md", "w")
    f.writelines(out)
    f.close()


# 你的TinyPNG密钥
tinify.key = "xxxxxxxxxxxxxxxxx"

# HTML img标签
html_part1 = "<img src = \"https://zhaoxuhui.top/assets/images/blog/content/"
html_part2 = "\" width = \""
html_part3 = "\">"

# 用户指定图片所在目录
root_dir = raw_input("Input the parent path of images:\n")

# 第一步,获取目录下所有图片路径
ori = findAllImages(root_dir)

# 第二步,根据规则创建新的文件名
start = raw_input("Input the start index of images:\n")
new = generateFormatName(ori, int(start))

# 第三步,文件批量改名
renameImages(ori, new)

flag1 = raw_input("Resize all images?y/n\n")
if flag1 == "y":
    # 第四步,批量修改文件大小并替换原图
    saveImages(new)

flag2 = raw_input("Tinify all images?y/n\n")
if flag2 == "y":
    # 第五步,调用TinyPNG接口进行图像压缩,并替换原图
    tinifyImage(new)

flag3 = raw_input("Auto insert tags into files?y/n\n")
if flag3 == "y":
    # 第六步,生成每个文件对应的img标签并自动插入
    # 注意文件名不支持中文
    file_path = raw_input("Input the file path:\n")
    insertImgTag(html_part1, html_part2, html_part3, new, file_path)
else:
    # 第六步,生成每个文件对应的img标签
    generateHTML(html_part1, html_part2, html_part3, new, root_dir)
三、测试
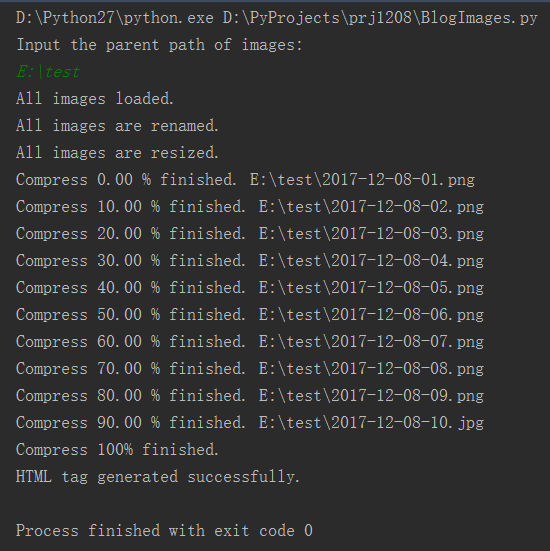
在电脑中选取了10张从50多像素到1920像素的不同图片作为测试。在控制台输入图片所在目录。输出结果如下:
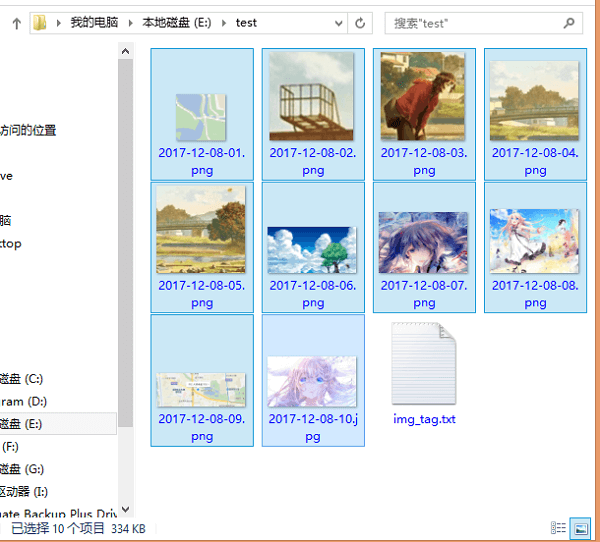
 同时可以看到,已经在文件夹中自动修改了文件名并进行了压缩,而且生成了img_tag.txt文件。
 txt文件内容如下,直接复制到需要的位置即可。
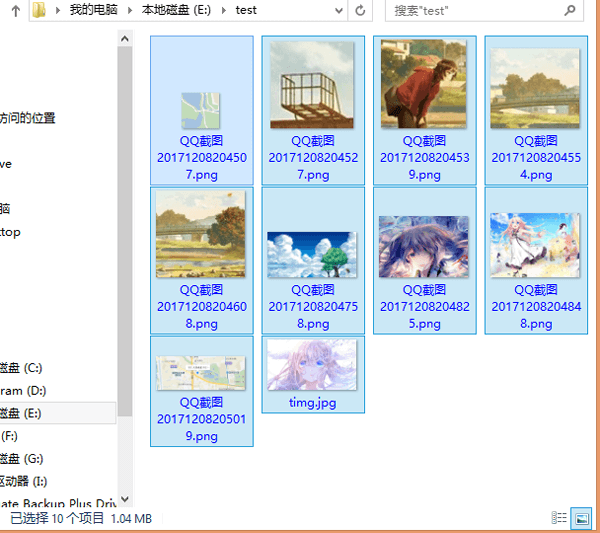
 类比未修改过的文件,如下。可以看到原始大小是1.04MB,压缩完以后是334KB。效果还是很明显的。
而且文件名、大小也都改好了。img标签直接粘贴就行。整个过程效率大大提升。

项目的py文件传到了Github,点击这里可以下载。
本文作者原创,未经许可不得转载,谢谢配合
