MNIST
经典的MNIST问题,相关原理其实和上一篇博客类似。利用线性模型y=Wx+b并结合Softmax实现分类。 更多有关原理的部分可以参考之前的这篇博客或者TF官方教程。 这篇博客主要侧重于代码实现。并且代码整体框架沿用上篇博客的“曲面拟合”,也以此来展示虽然不同任务的目标不同,但是使用TF的步骤基本是一样的。 代码如下。
# coding= utf-8
import tensorflow as tf
import time
import numpy as np

# 1.载入数据
import input_data

mnist = input_data.read_data_sets("MNIST_data/", one_hot=True)
# 这里的x和y_分别表示每一张输入图像和其对应的标签
x = tf.placeholder(tf.float32, [None, 784])
y_ = tf.placeholder(tf.float32, [None, 10])

# 2.定义模型变量
# 模型沿用上一篇的y=Wx+b,x为输入变量,y为我们预测的结果
W = tf.Variable(tf.zeros([784, 10]))
b = tf.Variable(tf.zeros([10]))
# 这里之所以写成xW而不是Wx是因为x是n×784,如果写成Wx,这样W一维就必须也是n了
# 而且这样最后Wx的结果是一个10×784的矩阵,显然不是我们想要的
y = tf.nn.softmax(tf.matmul(x, W) + b)

# 3.定义评价指标
# 利用交叉熵作为评价指标
cross_entropy = -tf.reduce_sum(y_ * tf.log(y))

# 4.构造运行图
optimizer = tf.train.GradientDescentOptimizer(0.01)
train = optimizer.minimize(cross_entropy)

# 5.启动图
init = tf.global_variables_initializer()
sess = tf.Session()
# 运行之前必须要先运行这行代码,进行初始化
sess.run(init)

# 6.开始训练
t1 = time.time()
for i in range(1000):
    batch_xs, batch_ys = mnist.train.next_batch(100)
    sess.run(train, feed_dict={x: batch_xs, y_: batch_ys})
    # 6.评估精度
    correct_prediction = tf.equal(tf.argmax(y, 1), tf.argmax(y_, 1))
    accuracy = tf.reduce_mean(tf.cast(correct_prediction, tf.float32))
    # 输出训练精度
    if i % 20 == 0:
        print("step", i,
              sess.run(accuracy, feed_dict={x: mnist.test.images, y_: mnist.test.labels}))
t2 = time.time()

# 输出最终的模型精度以及模型参数
print("Final accuracy", sess.run(accuracy, feed_dict={x: mnist.test.images, y_: mnist.test.labels}))
res_w = sess.run(W)
res_b = sess.run(b)
print(res_w)
print(res_b)
# 将参数保存为文本文件供后续调用
np.savetxt("res_w.txt", res_w)
np.savetxt("res_b.txt", res_b)
print(t2 - t1, "seconds in total.")
这里需要注意的是import了一个input_data脚本,如果提示没有,只需要新建一个同名文件,然后复制下面的代码,并将这个文件和上面的代码放在一起就可以了。
# Copyright 2015 The TensorFlow Authors. All Rights Reserved.
#
# Licensed under the Apache License, Version 2.0 (the "License");
# you may not use this file except in compliance with the License.
# You may obtain a copy of the License at
#
#     https://www.apache.org/licenses/LICENSE-2.0
#
# Unless required by applicable law or agreed to in writing, software
# distributed under the License is distributed on an "AS IS" BASIS,
# WITHOUT WARRANTIES OR CONDITIONS OF ANY KIND, either express or implied.
# See the License for the specific language governing permissions and
# limitations under the License.
# ==============================================================================

"""Functions for downloading and reading MNIST data."""
from __future__ import absolute_import
from __future__ import division
from __future__ import print_function

import gzip
import os
import tempfile

import numpy
from six.moves import urllib
from six.moves import xrange  # pylint: disable=redefined-builtin
import tensorflow as tf
from tensorflow.contrib.learn.python.learn.datasets.mnist import read_data_sets
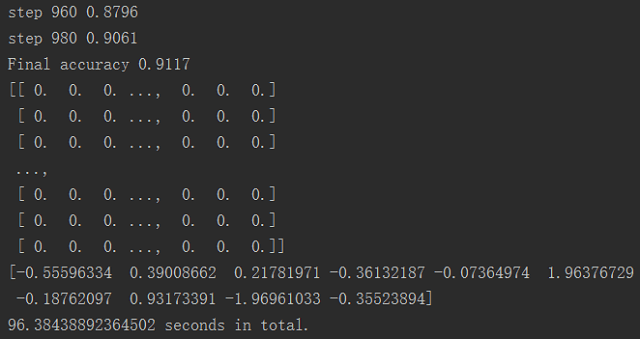
下面是代码跑完以后的结果,可以看到,精度基本在90%左右,耗时96s。
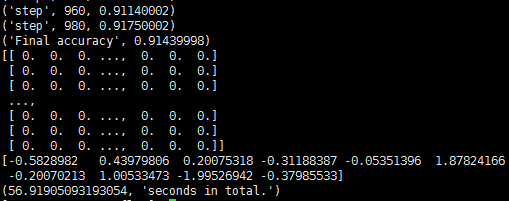
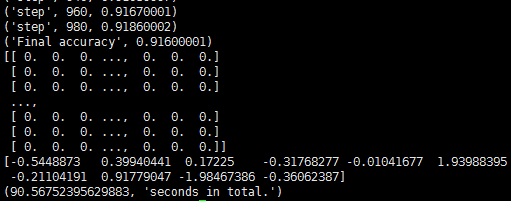
下面分别是在阿里云ECS和DigitalOcean的VPS上跑的结果,精度差不多,但耗时有些差别。相比之下还是阿里云的ECS计算性能更高一些,快了大约三分之一。
 其实如果仔细一些会注意到,我在服务器上装的都是Python的2.7版本。但我在很久之前的一篇配置TF的博客里说,目前TF只支持Python3。
这看起来是矛盾的,其实不然。在TensorFlow的PYPI网页上,就能看到支持的种类了。
其实如果仔细一些会注意到,我在服务器上装的都是Python的2.7版本。但我在很久之前的一篇配置TF的博客里说,目前TF只支持Python3。
这看起来是矛盾的,其实不然。在TensorFlow的PYPI网页上,就能看到支持的种类了。
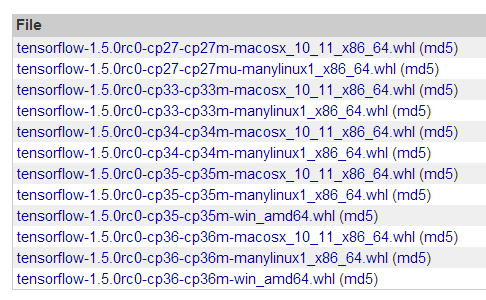 会发现对于Windows平台,从cp35才有,也就是说确实是只支持Python3.5及以上的。
但是对于Linux和MacOS,则是支持cp27,也就是Python2.7的。
正是这个原因,才能在Python2.7下跑TensorFlow。
会发现对于Windows平台,从cp35才有,也就是说确实是只支持Python3.5及以上的。
但是对于Linux和MacOS,则是支持cp27,也就是Python2.7的。
正是这个原因,才能在Python2.7下跑TensorFlow。
为了更进一步的检验效果,写了下面的脚本用于测试。
# coding=utf-8
import tensorflow as tf
import numpy as np
from matplotlib import pyplot as plt
from tensorflow.contrib.learn.python.learn.datasets.mnist import read_data_sets

image_index = 100

# 1.Read and process image
mnist = read_data_sets("MNIST_data/", one_hot=True)
images = mnist.test.images
img = np.reshape(images[image_index], [1, 784])
reshaped_img = img.reshape(28, 28)

# 2.Load params
W = np.loadtxt("res_w.txt", np.float32)
b = np.loadtxt("res_b.txt")

# 3.Create model
x = img
y = tf.nn.softmax(tf.matmul(x, W) + b)

# 4.Run model
init = tf.global_variables_initializer()
sess = tf.Session()
sess.run(init)
result = sess.run(y)

# 5.Show results
print("Number is", np.where(result == np.max(result))[-1][0], "(", np.max(result), ")")
print(result)
plt.imshow(reshaped_img, cmap='binary')
plt.show()
运行该脚本,图像索引为100对应的图片以及识别结果如下所示。
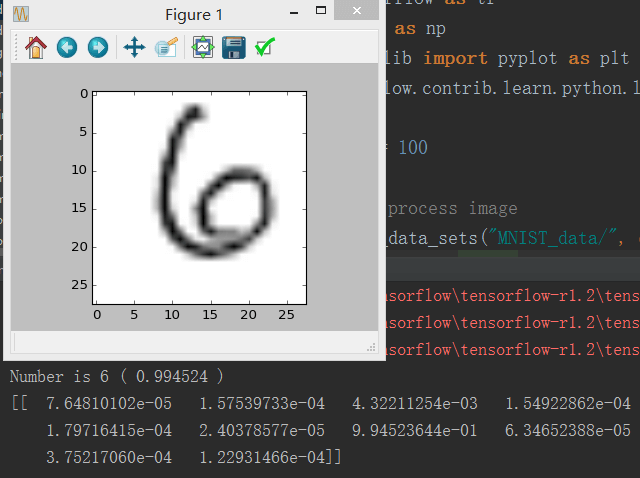 可以看到,比较好地识别出了数字。至此,MNIST入门笔记到此结束。通过入门笔记,学习了解了TF的运行流程。虽然这里用的是简单的线性模型,也没有用到卷积,但后续程序的流程依旧还是这样的,不会有大的变化。
掌握了这个,后面也就会简单点了。
可以看到,比较好地识别出了数字。至此,MNIST入门笔记到此结束。通过入门笔记,学习了解了TF的运行流程。虽然这里用的是简单的线性模型,也没有用到卷积,但后续程序的流程依旧还是这样的,不会有大的变化。
掌握了这个,后面也就会简单点了。
本文作者原创,未经许可不得转载,谢谢配合